
Want to know why some image generation sessions deliver stunning, high resolution art while others fall flat? You control the outcome. Your wording, focus, and understanding of lighting, face detail, and body design make the difference.
In 2025, tools like Stable Diffusion, Aitubo AI, and Perchance give you unprecedented control. They can render skin texture, fabric, and eyes with crisp detail when you guide them well. Aitubo AI stands out for high resolution output suited to print and digital use.
This introduction shows you why mastering prompt craft matters. You will learn how to generate images with the right composition, lighting, and character focus. Clear instructions help the generator render consistent facial features and body proportions.
Key Takeaways
- Precise wording shapes image quality and detail.
- Lighting, face, and eyes determine realism.
- Aitubo AI and Stable Diffusion deliver high resolution results.
- Focus on skin, fabric, and rendering for consistent outputs.
- Use free resources and best examples to refine your technique.
Understanding the Basics of NSFW AI Prompts
A clear, structured instruction is the foundation of every successful explicit image generation.
Prompts are sets of instructions that tell a generator what to make. They range from a single line to detailed technical text. Keep your lines precise to control mood, lighting, and face detail.
When you work with Stable Diffusion or similar diffusion platforms, the wording sets the quality and consistency of the final art. Specify skin texture, body pose, and soft lighting to guide rendering. Note how small details—eyes, face features, fabric folds—change realism.
| Type | Use-case | Key Focus |
|---|---|---|
| Simple | Quick concepts and anime sketches | Basic mood, pose, character |
| Detailed | Realistic nude or lit room scenes | Skin texture, lighting, face, eyes |
| Technical | High-resolution print or commercial art | Resolution, rendering settings, fabric design |
Start with a clear setting and character brief. Then add lighting, focus, and resolution notes. As you refine wording, your image generation will deliver higher quality and truer-to-intent results.
How AI Interprets Your Textual Instructions
Your description acts like a blueprint: the model translates it into layered visual choices. The system maps your words to visual concepts learned during training. This mapping decides what shows up first in the image.
The Role of Natural Language
Natural language gives the generator context about characters, mood, and scene. The model breaks your text into tokens and links them to learned features like skin texture, face shape, and body pose.
Short, clear sentences help the model keep focus on key features. Describe the face and eyes if those details matter. State the lighting or soft lighting to shape mood and rendering quality.
Using Specific Tags
Tags act as priority flags. When you add tags for pose, style, or fabric, the generator knows which elements to emphasize.
- Combine descriptive sentences with targeted tags for consistent anime or realistic results.
- Use tags to lock pose and maintain character design across multiple images.
- Choose tags that match the platform or model, such as stable diffusion or a preferred generator.
“Mixing precise tags with plain language gives the best control over composition and detail.”
| Instruction Type | What It Guides | When to Use |
|---|---|---|
| Natural Language | Scene, mood, general design | Start of prompt to set context |
| Specific Tags | Pose, face detail, fabric, lighting | When consistency and quality are critical |
| Combined | High detail art, anime characters, accurate skin and body rendering | Complex generation or series of images |
Tip: Test short variations and note which wording improves resolution and detail. Small edits to face, eyes, or lighting often yield big gains in final image quality.
Essential Elements for High Quality Image Generation
Getting pro-level results starts with defining the subject and environment before any style notes.
Balance is a simple rule: clear subject, coherent setting, and purposeful lighting. Each part shapes how the generator renders skin, body, and face features.
Use a compact formula: subject + description + setting + style + lighting + quality. That formula keeps the focus on pose, fabric, and facial detail.
- Describe the character and pose so the body and face stay consistent across images.
- Specify soft lighting or a lit room to enhance skin texture and eyes.
- Add fabric and design notes to guide realistic rendering of clothing or nude anatomy.
Platforms like Aitubo AI and Stable Diffusion support high resolution output when you provide focused detail. Test variations to refine mood and composition for better art quality.
“Lighting and precise subject detail turn a decent image into professional art.”
Mastering the Art of Descriptive Language
Vivid, precise description is the single best tool for turning a concept into convincing, high quality art.
Start by setting the scene. Describe the room, the light source, and the mood in short, concrete phrases. For example: “dimly lit with soft candles and plush fabrics” gives clearer cues than just “a room.”
Focusing on Skin and Fabric Details
Call out texture and temperature for skin and fabric. Use words like “velvet,” “sheer,” “porcelain skin,” or “warm undertones” to help the generator render realistic surfaces.
Face and eyes matter. Name expressions, eye color, and small features to keep the face consistent between images. Short lines that list these traits work best.
- Describe the pose and how fabric drapes over the body to guide composition and rendering.
- Specify soft lighting or direct light to control shadows and resolution of skin detail.
- When working in anime style or realism, match adjectives to the chosen style for consistent design.
“Detailed sensory language gives the model fewer guesses and more accurate results.”
Selecting the Right Model for Your Creative Vision
The model you choose determines whether the image leans toward crisp realism or stylized anime charm.
Different models excel at different styles. Some are tuned for photorealistic skin, light, and detailed facial features. Others focus on crisp anime lines, expressive eyes, and stylized body design.
On platforms that run Stable Diffusion, you can swap checkpoints to match your intent. A checkpoint built for anime will handle poses and character design well. A realism-focused model will render skin texture, soft lighting, and fabric with higher fidelity.
Choosing the right model is as important as writing the correct prompt. For nsfw work, select models that are fine-tuned for adult content if you need consistent face, body, and resolution. Track which models produce the best art for a given pose, mood, or character type.
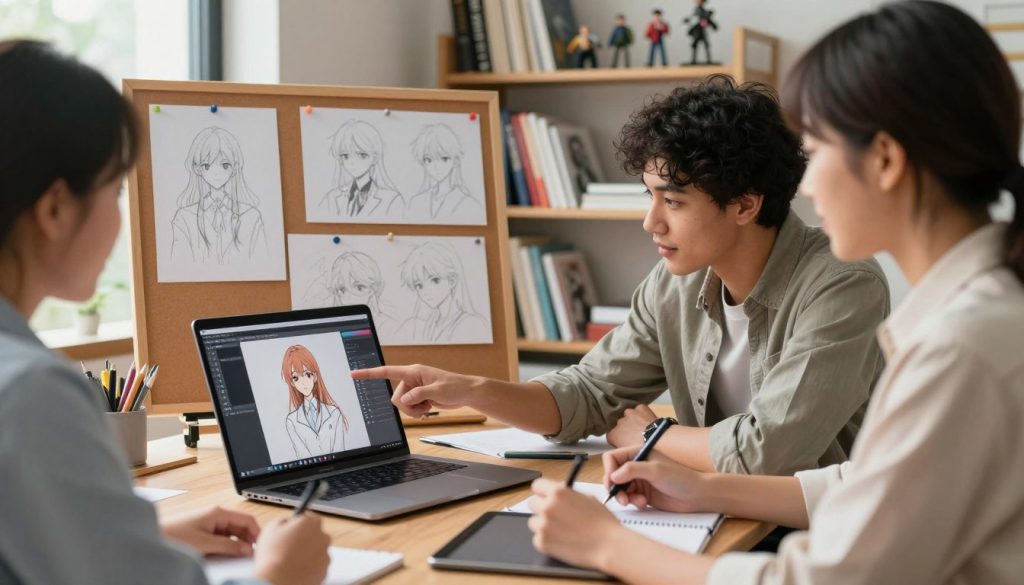
“Match your model to the style and lighting you want; the result will save time and improve quality.”
- Pick anime-focused models for stylized characters and expressive eyes.
- Choose realism checkpoints for skin detail, fabric rendering, and lifelike faces.
- Test models with the same prompt to compare pose handling and overall rendering quality.
Optimizing Settings for Stable Diffusion and Beyond
If you want clean skin, sharp faces, and fewer artifacts, learn to manage your settings.
Resolution affects detail and VRAM needs. Higher resolution gives clearer skin, fabric, and facial features, but it uses more memory and time. Start with a mid-range size and scale up as you test.
Adjusting Resolution Parameters
Raise resolution for high resolution prints or close-up face shots. Lower it for fast concept checks. Track how changes affect the model and style you use.
Managing Sampling Steps
Sampling steps control refinement. More steps usually improve image quality up to a point.
- Use moderate steps for anime-style work and more for photorealistic skin.
- Change the sampling method or CFG scale to balance detail and mood.
- Test with Automatic1111 or similar WebUI to compare results quickly.
“Proper setting management is essential for achieving artifact-free, high quality images.”
| Parameter | Effect | When to Use |
|---|---|---|
| Resolution | Detail, VRAM cost | High for close-ups; low for drafts |
| Sampling Steps | Refinement, fewer artifacts | Increase for realism, lower for speed |
| CFG Scale / Sampler | Faithfulness to prompt vs. creativity | Tighten for consistent faces and pose |
Crafting Effective NSFW AI Prompts for Consistent Results
Keep a steady core of keywords and negatives to lock in consistent character design across runs.
Consistency is built from a short, repeatable backbone you reuse for every generation. Pick a stable set of words for pose, skin, face, and lighting, then add negative terms to exclude artifacts.
Test small variations. Change one word or setting at a time. Track which model and settings deliver the best quality for anime or realistic nude art.
Focus on the face and eyes first, then lock pose and body description. Use concise lines for fabric and mood so the generator keeps rendering detail where you want it.
- Use negatives to remove unwanted elements.
- Keep prompts brief but descriptive to improve focus.
- Reference community examples for structure and inspiration.
“A stable prompt backbone plus consistent settings gives repeatable, high quality images.”
Exploring Different Artistic Styles and Moods
Explore how shifting between stylized and lifelike choices shapes the mood and impact of your images.
Balance matters: blend fantasy words with realistic descriptors to get the best of both worlds. Use tags for anime or hyper-real styles, then add notes on skin, fabric, and face detail.
Balancing Fantasy and Realism
Pick a clear style first, then lock the pose and character design. That keeps the body, face, and eyes consistent across generations.
Adjust lighting and color palette to set mood. Soft lighting brings out skin texture and subtle shadows. Strong directional light adds drama and more visible detail.
- Try variations: test a fantasy palette with realistic skin tones.
- Focus on the face: eyes and expression anchor the image’s emotion.
- Match platform tools: Stable Diffusion or an anime-focused checkpoint can change rendering and resolution.
“Mixing a clear style tag with precise lighting notes lets you push creative limits while keeping quality high.”
| Style | Best Use | Key Focus |
|---|---|---|
| Hyper-realistic | Close-up portraits and print | Skin, light, face, resolution |
| Anime | Expressive characters and poses | Eyes, line work, stylized body |
| Fantasy | Surreal scenes and design experiments | Color palette, mood, fabric |
Utilizing Advanced Techniques for Character Design
Layering small, distinctive traits gives your characters a memorable silhouette and story.
Start with a compact checklist: face, eyes, body proportions, pose, and signature accessories. Each layer adds narrative and helps the model keep features consistent across images.
Use character-focused models or LoRAs to lock facial features and cloth behavior. These tools keep skin texture, fabric folds, and edge detail steady when you run multiple generations.
Design the full body, not just the face. Posture and limb placement change mood and the perceived weight of fabric. Soft lighting and careful shadowing add depth and improve rendering quality.
“Iterative tweaks to wording and settings yield highly personalized, high-quality art.”
- Detail the outfit and small props to anchor style and fantasy elements.
- Keep a stable core of descriptors for pose and face to maintain continuity.
- Refine in small steps: change one element per run to spot improvements in resolution or skin detail.
| Technique | What It Controls | When to Use |
|---|---|---|
| LoRA / Checkpoint | Consistent face, eyes, and style | Series of images or character sheets |
| Layered Details | Accessories, fabric, and small marks | Unique character identity |
| Lighting & Shadows | Depth, skin tone, mood | Close-ups and full-body shots |
Managing Lighting and Shadows for Realistic Rendering
Lighting controls how your subject reads — it can sell depth, mood, and realism in one pass.
Start by choosing a clear lighting goal for the scene. Soft lighting brings out skin texture and smooths hard edges. Hard directional light creates drama and sharper shadows that define body form.

Creating Soft Lighting Effects
Use terms like “diffused light,” “rim lighting,” or “golden hour” in your directions to cue the platform or model toward softer renders.
Diffused light reduces harsh highlights and helps fabric and skin read naturally. Rim lighting separates the character from the background and adds a polished, high quality finish.
Enhancing Facial Features
Place light to emphasize the face and eyes. A gentle key light with subtle fill keeps cheek contours and eye catchlights clear.
Shadows are just as important: they add volume to the nose, jaw, and collarbone. Global illumination and ambient occlusion terms will guide better rendering of subtle contact shadows and depth.
- Tip: Lock a pose and mood, then test three lighting setups — soft, rim, and golden hour — to see which highlights skin and body best.
- Adjust intensity and angle for the eyes; small changes yield big gains in perceived realism.
“Good lighting makes even simple design read as high quality art.”
Common Pitfalls to Avoid During Generation
A muddled brief usually turns a promising concept into an uninspired render.
Be specific. Vague wording produces generic art and low quality images. State the scene, pose, and mood in short lines so the model keeps focus on the face, eyes, and body.
Don’t overcomplicate your language. Excessive technical terms can create artifacts and confuse rendering. Keep sentences clear and direct to preserve skin and fabric detail.
Give context about the character and setting. Missing context often causes wrong lighting, awkward pose, or odd features in the final image.
Limit reliance on a single style or model. Try a different checkpoint or an anime-focused model to find what handles skin, resolution, and face consistency best.
“Short, well-structured instructions and model tests beat long, tangled copy every time.”
- Keep prompts concise to protect quality and focus.
- Test one change at a time to spot what improves skin or eyes.
- Rotate styles and models to avoid creative stagnation.
Leveraging Free Tools for Prompt Inspiration
If you feel stuck, tapping community databases can jumpstart new styles, poses, and rendering choices.
Community-driven libraries like Civitai and Lexica are gold mines for art ideas. They show real examples of pose, lighting, skin, and fabric so you can study what works.
Perchance is useful when you need random, quick ideas for mood or character design. Discord servers focused on creative work are active hubs for sharing settings and model tests.
How to use these resources
- Study shared entries to copy structure and learn wording that preserves face and eyes detail.
- Analyze settings behind high quality images to match resolution and lighting choices in your runs.
- Use examples as a safe, free use reference to refine character, body, and fabric descriptions.
Tip: Save a short list of favorite entries. Reuse the best lines for consistent style and pose across a series of images.
“Learning from community examples is the fastest route to better art and more reliable rendering.”
Integrating Image to Image Workflows
Use an existing image as your base to control pose, face, and overall design. Image-to-image workflows let you keep a character consistent while you change style or mood.
This technique is ideal for refining poses or enhancing skin and fabric detail. Load a reference and set denoising strength to decide how much the model alters the base. Low strength keeps the original body and face; higher strength shifts style more.
Platforms like Aitubo AI and Stable Diffusion tools provide robust image-to-image features for nsfw work. Use them to preserve eyes and facial features across multiple scenes.
- Keep the pose fixed: use the base to lock limb placement and silhouette.
- Fine-tune lighting: change soft lighting or rim light without breaking skin detail.
- Test styles: swap style tags or checkpoints to move between anime and realistic rendering.
“Image-to-image lets you iterate quickly while protecting the character you built.”
Refining Your Output with Post Processing
Finishing touches can lift a good render into a professional-quality image. After generation, use upscalers to boost resolution and clarity. This helps skin, fabric, and tiny facial features read cleanly at print size.
Open the file in an editor to fix color, contrast, and light. Small tweaks to curves and warmth keep the mood you set during generation. Inpainting lets you redo a face, hand, or any body area without rerunning the whole job.
Outpainting expands the scene when you need a wider composition or more context. Use local edits to preserve the character and pose while improving background and lighting.
- Upscale for high resolution deliverables.
- Inpaint to correct eyes, face, or fabric artifacts.
- Adjust light and color to match your original style and mood.
“Post-processing is the final step that turns a render into polished art.”
Ethical Considerations and Platform Guidelines
Treat privacy, consent, and platform limits as part of your creative checklist.
Always follow the platform’s terms of service. Read rules on explicit content before you start. Many services restrict certain nude scenes, sexual minors, or identifiable people.
Respect consent and privacy when you generate images of a real person. Avoid using real identities or photos without clear permission. That protects you and the long-term quality of the community.
Keep your work compliant: choose models and settings that match platform policy. If a platform forbids a style or pose, change your approach rather than workaround rules.
- Focus on safe character design, clear mood, and non-identifying faces and eyes.
- Document sources and permissions for references and model training material.
- Stay updated on platform guidance to keep accounts in good standing.
“Responsible use of tools ensures better art, reliable access, and respect for people.”
Conclusion
The best results come when you pair technical tweaks with clear creative intent. Practice both craft and experimentation to lift your art and improve overall quality.
Keep focus on the essentials: pose, skin, face, and eyes. Tune lighting and style to shape mood and rendering detail. Small edits to wording, model choice, and resolution produce noticeable gains.
Use free use community resources to study examples and refine character design, fabric, and composition. Stay mindful of ethics and platform rules as you work.
With steady testing and simple routines, you can produce consistent, high-quality nsfw images that match your vision every time.
FAQ
What basic elements should you include to write effective adult content prompts?
Start with a clear subject (character, pose), define the scene (setting, mood), and add style cues (photorealistic, anime, painterly). Include lighting, camera angle, and key visual details like skin texture, fabric, and facial expression to guide the generator toward the result you want.
How does natural language affect how models interpret your instructions?
Models rely on precise, unambiguous phrasing. Use short, active sentences and concrete nouns. Replace vague words with specific descriptors (for example, “soft backlight” instead of just “nice lighting”) so the system better maps words to visual features.
When should you use specific tags or keywords in a prompt?
Use tags when you need consistent stylistic elements across generations. Tags for style, resolution, and pose help stabilize outputs. Keep tag lists concise and prioritize the most important attributes to avoid conflicting instructions.
What are the essential settings that impact image quality most significantly?
Resolution, sampling method, and the number of sampling steps matter most. Higher resolution and more steps improve detail, while the sampling method affects texture and noise. Balance these with your hardware limits to avoid long render times.
How should you describe skin and fabric to get realistic results?
Use tactile, visual adjectives: “porcelain skin with subtle pores,” “sheer silk with soft reflections.” Mention specular highlights, translucency, and seams or folds so the rendering captures believable materials and surface interaction.
What factors help you choose the right model for a project?
Match the model to the visual goal: choose a model fine-tuned for anime if you want stylized characters, or a photorealistic checkpoint for realistic portraiture. Consider community benchmarks, available training data, and examples that align with your vision.
How do resolution and sampling steps interact when using Stable Diffusion–style pipelines?
Higher resolution demands more sampling detail. Increasing steps can sharpen features but yields diminishing returns past a point. Start with moderate steps at your target resolution, then fine-tune by increasing steps or switching samplers for cleaner results.
What prompt structure helps produce consistent adult-themed images across multiple runs?
Use a fixed core prompt that lists the subject, pose, lighting, and style, and then add variable modifiers for mood or accessories. Lock in key tags for model, resolution, and sampler to reduce variance between generations.
How can you balance fantasy elements and realism in a single image?
Anchor the composition with realistic lighting and anatomy, then introduce fantasy through color palettes, props, or backgrounds. Keeping material and facial detail believable preserves realism while fantasy motifs define the scene.
What advanced character design techniques improve uniqueness and coherence?
Use layered descriptions: start with base anatomy, then add distinguishing features (freckles, scars, tattoos), clothing design, and accessories. Reference specific art styles or artists sparingly to guide aesthetics without copying.
How do you create soft, flattering lighting in generated images?
Specify light sources (softbox, window), direction (rim, three-quarter), and modifiers like diffusion or warm temperature. Mention shadow softness and highlight falloff to achieve gentle, cinematic illumination.
What details enhance facial feature rendering and eye realism?
Describe eye catchlights, iris texture, and subtle skin microcontrast. Request precise eyebrow shapes, eyelash density, and soft shadowing around the nose and lips to improve facial fidelity.
What common pitfalls should you avoid when crafting prompts?
Avoid overly long contradictory instructions, vague adjectives, and too many competing styles. Don’t overload a single prompt with minor modifiers; instead, iterate and refine with focused changes.
Which free resources can help you find inspiration and tested phrasing?
Community prompt databases, Discord groups focused on image generation, and open repositories on Hugging Face or Reddit threads offer examples and tags. Use them to learn effective wording and common tag combinations.
How do you integrate image-to-image workflows into your process?
Start with a reference image for composition or color, set a controlled denoising strength, and use your prompt to refine style and details. Iteratively adjust the reference and prompt to converge on the desired output.
What post-processing steps most effectively refine generated images?
Use upscaling for resolution, subtle denoising for texture, and localized retouching for facial or fabric imperfections. Color grading and selective sharpening bring coherence and polish to the final image.
What ethical considerations and platform rules should you follow?
Respect copyright, avoid depicting real people without consent, and follow platform content guidelines regarding explicit material. Use clear consent and legal checks when sharing or monetizing generated work.